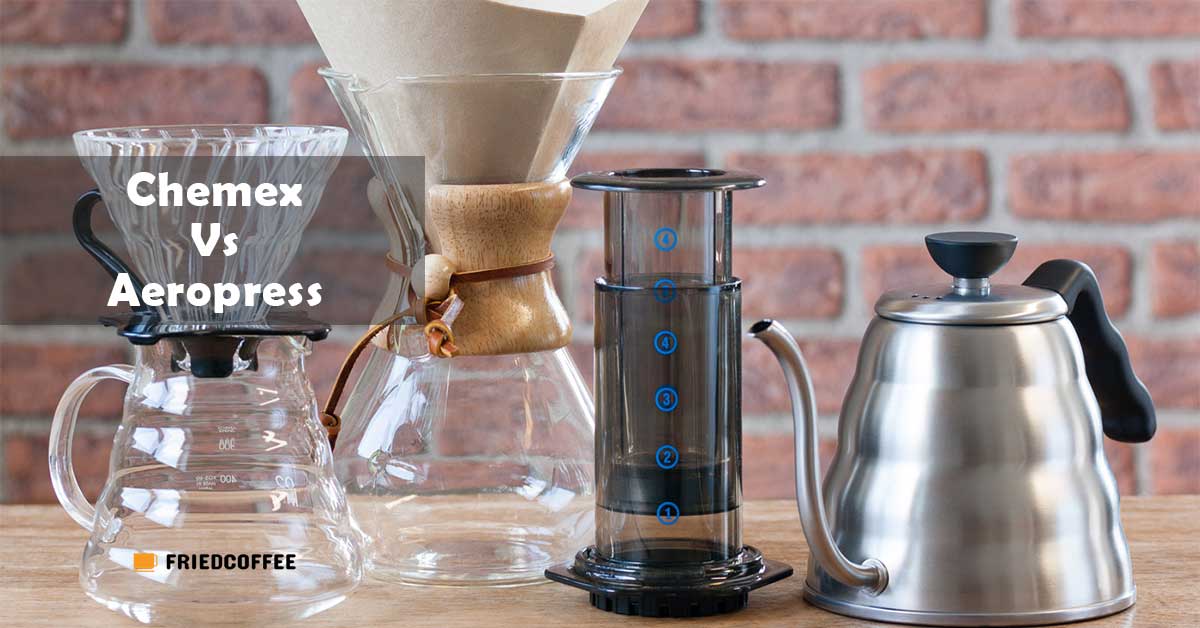
If you are a coffee fan you probably know what an Aeropress and what a Chemex is. Both of these brewing methods are two of the most popular tools to use in order to make filter coffee. What’s interesting is that they are very different from each other so each time you brew, you might get a different result. But how are they different? And what should you be aware of so that you can brew the best cup of coffee with them? Chemex vs Aeropress is what we will talk about in today’s article.
The more you know about how and why these brewing methods were invented, the better you will be able to brew with them. This is why we will first talk about their brief history and then we will introduce a brewing guide with best practices regarding the grind setting you should use, how long you need to brew your coffee, and which filters you can use. This comparison will offer you important advice about the Aeropress and the Chemex so you can then decide which one you prefer.
An AeroPress is also often compared with French Press, which uses immersion brewing technique. We have an article about French Press vs AeroPress, give it a go if you would like to know more.
Aeropress vs Chemex – Origin & History
History About Chemex
As for the Chemex, its story dates back to 1941. The man who came up with its design was a German chemist, Dr. Peter Schumbohm, who had invented many more patents for other devices like cocktail shakers and automotive. A coffee enthusiast himself, he wanted to invent a beautiful-looking vessel that would result in a bright and clean cup of coffee, which is why he used glass. When the Chemex was launched it became such a huge success that it’s displayed in a few museums in the United States.
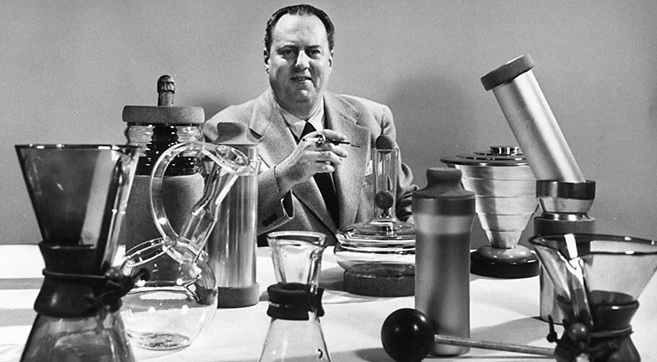
The design is simple. It’s just one piece of glass, shaped like an hourglass. The glass itself is heat resistant and features a wooden handle in the middle of the vessel. This handle is very useful for lifting the Chemex and pouring the coffee. There is a leather tie around the handle which helps with the handgrip. This simple, yet elegant looking design is not just nice to look at, it also results in a clear cup of coffee, without sediment and without any additional flavors from the glass or filters.
Aeropress History
The Aeropress is much more modern than the Chemex and was only invented in 2005. Alan Adler, its inventor, was simply trying to make his cup of coffee not taste so bitter. He believed that this bitter flavor was the result of long-brewing so he needed a plan to reduce it. For that to happen, he thought to trap water and coffee grounds in a small chamber where pressure could be applied. Much like the espresso machine, this technology would use the power of pressure to force the water through the coffee grounds.
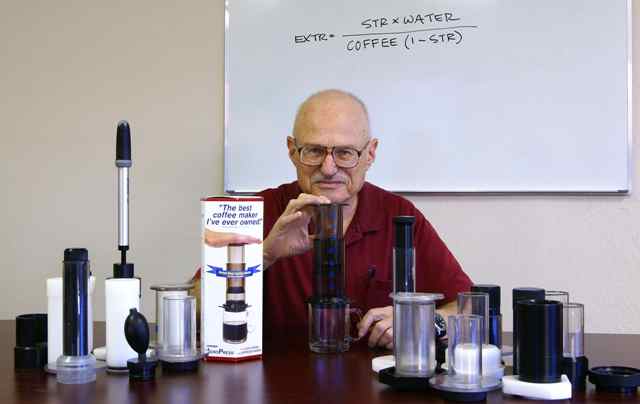
This is how he came up with the design for the Aeropress. The Aeropress consists of a plunger, a filter cap, a chamber, and paper or metal filters. By trapping the coffee grounds in a small chamber and forcing water via pressure, Alan succeeded in reducing the brew time. The use of pressure technology is very similar to the one espresso machines use; only the Aeropress needs electricity to make a nice cup of coffee. All you need is your hands. This makes it a popular brewing method for people who like camping and the outdoors. French Press vs Aeropress is often a topic of discussion because of similarity in a pressing pattern.
Chemex vs Aeropress – Brewing Guides
When it comes to the main difference between these two brewing devices, the method they use takes center stage. Like we mentioned above, the Aeropress relies on pressure. The water comes in contact with the grounds in a small closed chamber and the extraction takes place once the pressure is applied to the brew. The Chemex on the other hand is a pour-over method. This means that the water goes through a bed of coffee grounds and a paper filter in order to achieve extraction. Let’s find out what that looks like in practice.
How to Brew with an Aeropress
Up until now, the Aeropress comes in one size and you can use it to make one cup of coffee. It also has a reputation for being one of the most versatile brewing devices invented. This is because there are many variables that can be changed when you are brewing with it and will result in a different flavor profile. For the purpose of this article, we will see how we can use the Aeropress to make a clean cup that will bring out the best flavors of your coffee beans.
First, you need to preheat the Aeropress, your cup, and the paper filter you are using. Then measure 17g of coffee beans and grind them using a medium to fine grind setting. The reason you do this is that in order to brew a clean and bright cup of coffee the brew time must be short and a medium to fine grind setting extracts the coffee’s flavors faster than a coarser one. Moving on, insert the paper filter in the filter cap and place it inside the top of the Aeropress chamber.
Take the Aeropress plunger and place it inside the top of the chamber. At this point, you need to invert your Aeropress so that the plunger is on the bottom and the chamber is on the top. Add your ground coffee in the chamber and place the Aeropress on your scale. Start your timer and begin adding hot water, aiming for 250ml. Stir the coffee grounds to create some agitation in order for all the grounds to come in contact with the water for a better extraction.
Once you have reached the 250 ml of hot water, place your filter in the filter cap and rinse it with hot water. Then, attach it to the Aeropress chamber and flip the Aeropress onto your cup. Plunge down at a slow pace, about 20 seconds, and stop when you hear the hissing sound. That hissing sound is the last remaining natural oils of the coffee, which we recommend you don’t add to your cup if you want a clear coffee with bright acidity and fruity flavors.
Here is a video for all the Aeropress brewing activities!
What’s more, we can even make espresso with an Aeropress, but not with the Chemex.
How to Brew with a Chemex
There are a few sizes of the Chemex brewer you can buy: a three-, six-, eight- and a ten-cup. For this article, we will give the recipe for a six-cup Chemex. Start by heating your water. Place the Chemex paper filter inside the brewer and rinse it with hot water. This way you can avoid any flavors or odors from the paper filter and you will simultaneously preheat your Chemex. Pour the hot water out and put the Chemex on your scales.
Measure 28 g of coffee beans and grind them using a coarse grind setting. Place the coffee grounds in the filter, start the timer and get ready for the bloom. The first pour also called the bloom, is normally double the amount of water to coffee ratio, in this case about 55 ml. After about 30 seconds add more water. You are aiming for an overall brew time of about four minutes. Once you have reached 450 ml of water, stop the pour, take out the filter with the coffee grounds, serve the coffee in your mug and enjoy.
Here is the visual method!
Chemex vs Aeropress – The Differences
By now you would have noticed some of the main differences between the two brewing devices. Their design is completely different and their brewing method is as well. The Chemex uses a pour-over technology while the Aeropress relies on pressure. There are other differences though, the make these two brewers stand apart:
Filters: The Chemex filters are made from paper that is about 30% heavier than a normal paper filter, for example like the V60 filter paper. This allows for a clean, bright cup of coffee since the thick paper absorbs all the natural oils from the coffee grounds and results in no sediment in your cup. For the Aeropress, there are two types of filters you can buy, paper and metal. If you desire to brew your Aeropress for a clean cup then use paper filters but if you want your coffee to have more body, metal is the way to go.

Brew time: Since the Aeropress facilitates pressure in a small chamber, the extraction is shorter and thus the brew time is usually 2 minutes. The Chemex on the other hand is a pour-over brewing method and depending on the size of Chemex you use the brew time differs. The more cups you want to make, the more the coffee, the longer the brew time will be.
Grind setting: Since the brew time of the Aeropress is short, you need to grind your beans in a fine grind setting. The finer the ground the less ground surface the water has to cover, which allows for a faster extraction to match the 2-minute brew time. However, the Chemex needs a longer brew time and this is why you need a coarser grind setting. The surface of the coffee grounds will be bigger with a coarser grind setting and this will slow down the extraction to match the longer brew time.
More Uses of Chemex and Aeropress
Like we mentioned above, the Aeropress is a famous brewing device for coffee lovers that like camping and the outdoors. It has a reputation for being the number one portable coffee maker because of its simple compact design. It is also effortless to use, and overall maintenance is minimal. This inspired the inventor to design the Aeropress Go; a new design that offers a carrying case that can be used as a mug.

The Chemex on the other hand is not so easy to take out of the house. It is designed to be visually pleasing rather than functional. However, Chemex can make a very tasty cold brew because it yields a bright, clean cup of coffee. So next time you want to make a cold-brew, try adding some ice cubes at the bottom of your Chemex.

Now you have a better idea of how these two brewing devices differ. It is important to know their differences, design, and overall functionality so you can make coffee just as you like. Whether you prefer using a Chemex or an Aeropress to make your coffee, don’t forget to experiment. Don’t hesitate to ask us any questions on brewing with these two and have fun brewing!
