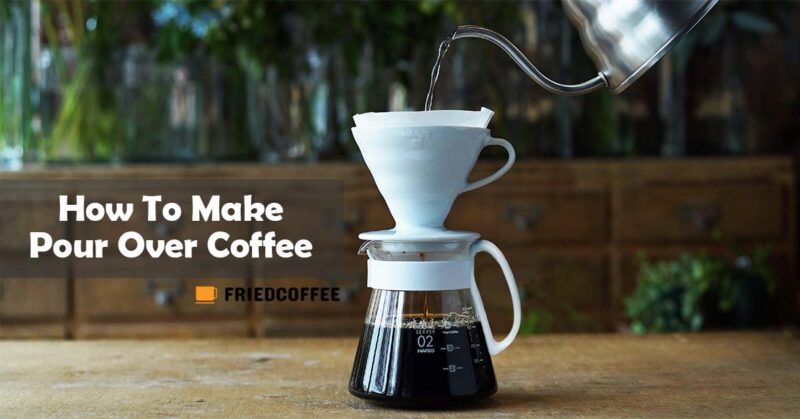
The art of brewing coffee by pouring hot water slowly and steadily onto the grounds is pour-over. This method eventually just requires a cup, a funnel, and a filter as equipment. At first, it might be a little tough for anyone, but with practice, it can be mastered.
With time, people have moved over to machine brewing as finding the ratio by a common drinker was difficult. The machines don’t do that error as they are programmed for the perfect. Most coffee connoisseurs still prefer to brew manual as they have full control over the brewing parameter as water temperature, coffee to water ratio, and pouring the water. And this really makes sense in this method.
How to Make Pour-Over Coffee
If you’re someone who’s just wanted the coffee to get in their cup and have never really investigated the how; it’s time to take a deep breath and undertake a deep dive. Chances are you’ve enjoyed a cup of coffee brewed using a drip coffee maker on more than one occasion, you probably just weren’t able to put a name to the method.
The electric drip coffee maker has been in existence since 1954 and manual, one even before that.
A few of the manual drip coffee makers are names you’re sure to have encountered in the past. They include the Kalita Wave, the Clever, and the V60. The automatic variants include the Braun BrewSense Drip Coffee Maker, the Ninja Hot, and Cold Brewed System, and the Bonavita One-Touch Coffee Maker to name a few.
The choice all comes down to how much creative control you wish to have in the process of assembling your caffeinated cup. While the automatic machines are easy to use and are mostly provided with an instruction manual, we would be focusing here on the manual Pour-over brewing method.
Below is the Step-by-Step on How to make Pour-Over Coffee perfectly.
Things Needed
- Coffee – A bag of your favorite coffee beans is kind of the obvious main ingredient.
- Your Favorite Pour Over Coffee Maker.
- A Coffee Grinder – If you’ve opted to receive whole beans in your home, you’re going to need a grinder ready to freshly powder those beans.
- A Coffee Filter – This can be a one-use filter that is customized to the appliance that has a home in your house. With an aim to be more environmentally conscious, a lot of coffee appliances come with their own reusable mesh filters.
- A spoon or a Coffee Scoop – An easy-forget item. Have a spoon ready to transfer the coffee grind into the filter.
- Scale – If you prefer to weigh your coffee grounds rather than measure them in a spoon, have an accurate digital scale ready.
- Water – Cold, preferably filtered water if you’re going to need to fill in a machine’s water reservoir
- A Gooseneck Kettle filled with boiled water.
- Receiving Vessel – If you are using a manual maker and do not wish to do brew directly into your coffee mug, keep a receiving vessel ready to collect the coffee once it falls through the filter.
- Your Favourite Coffee Cup – Everyone has the favored cup that they always reach for. It just adds that pinch of enjoyment to your daily cup.
Pour Over Brewing – Step by Step
- Measure and Grind the Beans – Use your weighing scale to pull 19 grams of beans for every 12 oz of water. Next, take out your coffee grinder and grind the beans to the medium-fine grind setting, a coarseness resembling sea salt.
- Place the Filter – If the coffee maker you are using requires a removable filter, position it within the filter basket. If the company or quality of filters is not specified, be careful of the one you choose to use. Low-quality rip-offs are not as dependable. They either rip when they come in contact with hot water, or transfer some fibers and, or flavors into your coffee as the water drips through.
- Pre-wet the Filter – Pre-wet the filter by pouring some boiled water out through your kettle and onto the filter paper. Throw away the water collected in the vessel.
- Put the Coffee Grounds – Place the coffee grounds into the coffee filter.
- Place the whole set-up on the Weighing Scale – Now place the whole apparatus over the scale and set it to zero.
- First Pour – Slowly pour a little of the boiled water onto the coffee grounds till the scale shows 60 grams (It will be roughly double the quantity of the coffee in case you don’t have access to the scale). Allow the coffee to bloom for thirty seconds.
- Second Pour – Now again pour the hot water starting from the center and spirally moving towards the outer edge will the scale shows a total of 150 grams. This step allows preparing all the grounds for extraction leaving the scope for some to stay trapped outside. Allow this whole thing to sit for 40-60 seconds.
- Third Pour – Pour an additional 100 grams of water totaling the scale to 250 grams in the same spiral way.
- Fourth Pour – After the water from the third pour has reached the bottom of the filter, slowly pour the remaining 100 grams of water again. The scale should show 350 grams as of now. For the best effect, start pouring from the outer circle, and work your way towards the center of the filter. Enjoy your Coffee!
It is never advised to pour entire water straight away onto your freshly ground coffee beans. If you’ve been doing that in the past and have been complaining of a punch of bitterness in your morning cup, this could be the reason why.
How to bring the most from your Pour-Over Coffee
Have you ever made yourself a cup of coffee? And it was alright. Not bad at all, but not great either. It was simply alright. When excellence is within your grasp, mediocrity can be highly frustrating. So what is it that makes an ok cup of coffee, intoxicatingly drool-worthy?
Keep a Check on as How Fresh are the Coffee Beans
A basic rule of thumb to follow is the fresher coffee grind, the better the coffee.
The best way to ensure you have freshly ground beans ready for your daily cup is naturally to buy the beans whole and grind them yourself at home.
Once ground, coffee beans begin to lose their flavor and fragrance as time passes. If for whatever reason you are unable or unwilling to procure a coffee grinder at home, try to find a coffee company that delivers freshly ground beans and be very careful about how you store them.
It is important to make sure that your coffee beans are stored in an airtight container far away from any strong flavors. If you do not follow through on these guidelines, it is possible you might find your coffee smelling or even tasting a little like whatever it is stored next to.
Pour Over Coffee Ratio
As a general rule of thumb, the coffee to water ratio is to be kept at 1:17, which means a part of coffee with 17 equal parts of water. For example, with 13 grams of coffee, you need to add 221 grams of water. But according to SCAA ( Specialty Coffee Association of America, the recommended coffee to water ratio for pour-over brewing is 55 g/L ± 10%. It states that with every 55 grams of coffee, one needs to use 1 liter of water and you can experiment for optimal taste by increasing or reducing the coffee by 10%. Here is a more easy split for you.
| Coffee (gm) | Coffee (tsp) | Water (mL) | Water (Oz) |
|---|---|---|---|
| 13 | 2.6 | 237 | 8 |
| 19 | 3.9 | 355 | 12 |
| 26 | 5.3 | 473 | 16 |
| 39 | 8 | 710 | 24 |
Keep the coffee maker clean
Bringing home a coffee machine with all the bells and whistles can at times amount to quite a hit on your wallet. It is considered an investment by many. And like any other investment, it is important to ensure it is working at top capacity. For that to happen, cleanliness and maintenance are essential.
Whether you’re using a Kalita Wave or a Clever, all the surfaces both inside and out must be thoroughly cleaned. If you find yourself forgetting to do the task one day you’re ensured to taste the repercussions in your next coffee. Apart from wiping down the machine after every use, it is also advised to do a deep clean of the coffee maker at least once a month. If you smell something foul or see visible signs of either sediment or coffee stains on your coffee maker, it’s a safe bet you’ve waited too long and need to get cleaning right away.
Consistency of the Coffee Grind
If you thought goldilocks had it bad having to figure out the porridge, chair, and bed that was just right for her, think again. Locking in the size of your coffee grind plays a key role in the overall flavor and enjoyment of a caffeinated cup.
So how fine, or coarse should your serving of ground coffee be when it comes to pour-over coffee? Science dictates the more you grind your coffee, the simpler it is to expel the flavor from them.
If your grind is too coarse you could end up over extracting the coffee which will leave you with a cup that is unfavorably bitter. If on the other hand, you grind too finely, your coffee might just be lacking that punch that pushes it through to perfect.
The go-to size advocated by the experts is between a medium to medium-fine grind.
At the end of the day though, it all comes down to personal taste. So try a few rounds, make a few changes and stick to what works best for you.
Quality and Temperature of Water Used
The majority ingredient in a cup of unadulterated coffee is water. Naturally paying special attention to it will drastically affect the flavor and enjoyment of your daily cup.
To start, if you’ve been simply adding tap water to your coffee every day, it might be time to make a change.
The reason? Depending on where you stay, tap water can contain both impurities and, or minerals. Both can play an important role in altering the taste of your drink. The coffee-to-water ratio that you should turn to once again depends heavily on personal preference and tolerance levels.
The go-to ratio is two tablespoons of coffee to every six ounces of water, or weigh in 15 grams of coffee for every 225 grams of water. If you want your coffee stronger increase the quantity of coffee, if it’s too intense for you, increase the proportion of water.
Try to ensure the water temperature measures close to 91–96 degrees celsius for the best extraction from the beans.
At the end of the day
It doesn’t take long to get attached to the coffee maker in your home be it manual or otherwise. Allow yourself a little trial and error when you begin figuring out what works for you. Trust in your taste and alter the ingredients in your creation accordingly. Once you’ve learned all the tricks of the trade, and locked in all the nitty gritty, preparing a cup of coffee can be the highlight of your day.


